Wastewater Decanter Centrifuge - 0.1 RPM Bull Gear, 2.95 RPM Pinion
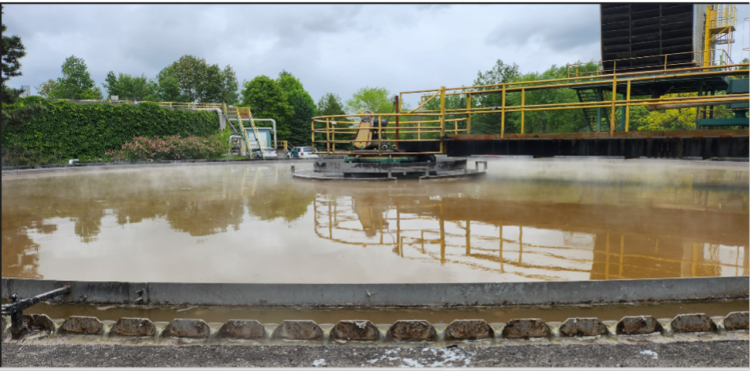
This large wastewater decanter centrifuge is tasked with continuously separating solid materials from liquids at a Canadian Pulp & Paper Mill.
Enormous quantities of water are used in the pulp and paper manufacturing process. For the process to be successful, fibres, such as pulp, wood, wood chips, and recycled paper must be suspended in water. In doing so, large amounts of wastewater is created. This wastewater must then be recovered so it can be reused in the future. Part of the wastewater recovery process involves using a Wastewater Decanter Centrifuge.
The Wastewater Decanter Centrifuge turns extremely slowly. The Bull Gear takes about 10 minutes for it to complete one full rotation, the pinion rotates at 2.95 RPM.
Due to the slow-speed nature of this asset, an ultrasound data collector with the ability to record large amounts of data, in the form of a long acquisition time is the best tool for the job.
When monitoring this asset, the SDT Ultrasound Solutions Partnered Ultrasound Services Team chooses to take readings with the #SDT340, as it is capable of taking 10 minute readings, which are necessary to capture one full rotation of this assets bull gear.
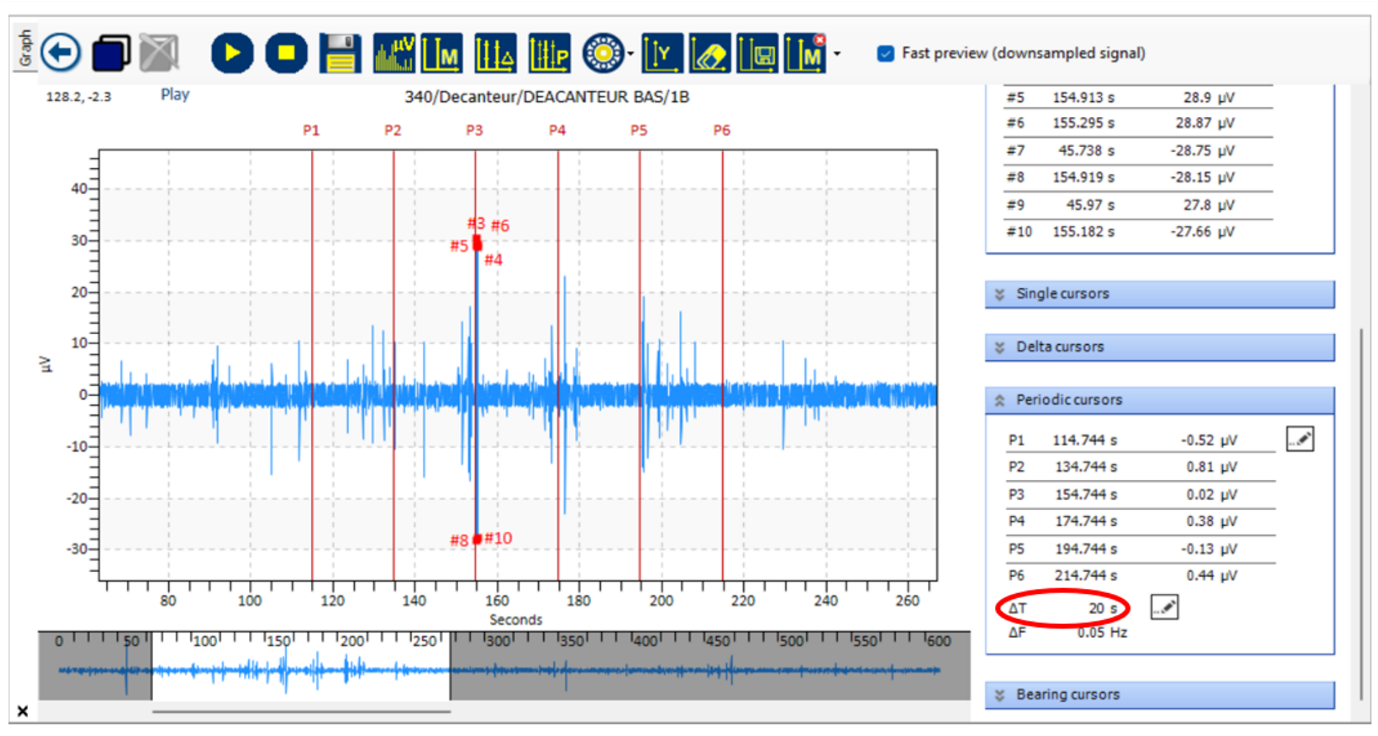
The 10 minute time waveform recording can be observed below in Figure 1.

Figure 1 - 10 Minute Time Waveform of Wastewater Decanter Centrifuge Pinion

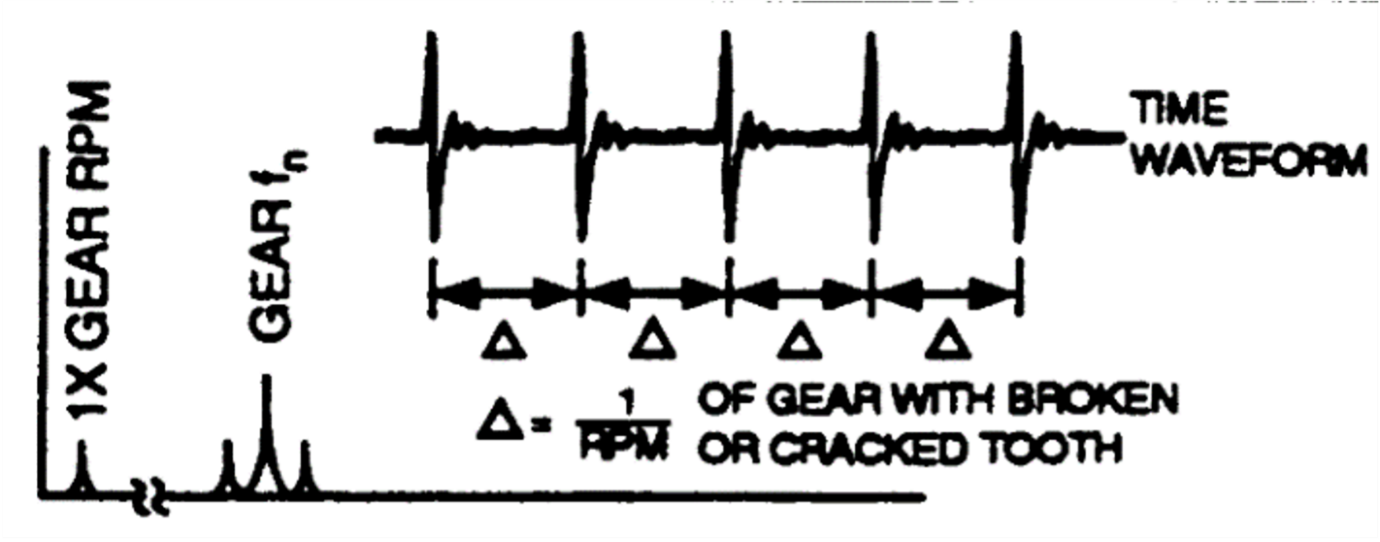
Figure 2 - Cracked or Broken Tooth
Observed in Figure 1, we can see a similar pattern to that in Figure 2. There is a pronounced spike every time the problem tooth tries to mesh with the teeth of the bull gear. The time between impacts corresponds to 1/RPM of the gear with the tooth problem. This data analysis lead SDT’s Reliability Technicians to believe there is a cracked/broken tooth on the pinion gear.
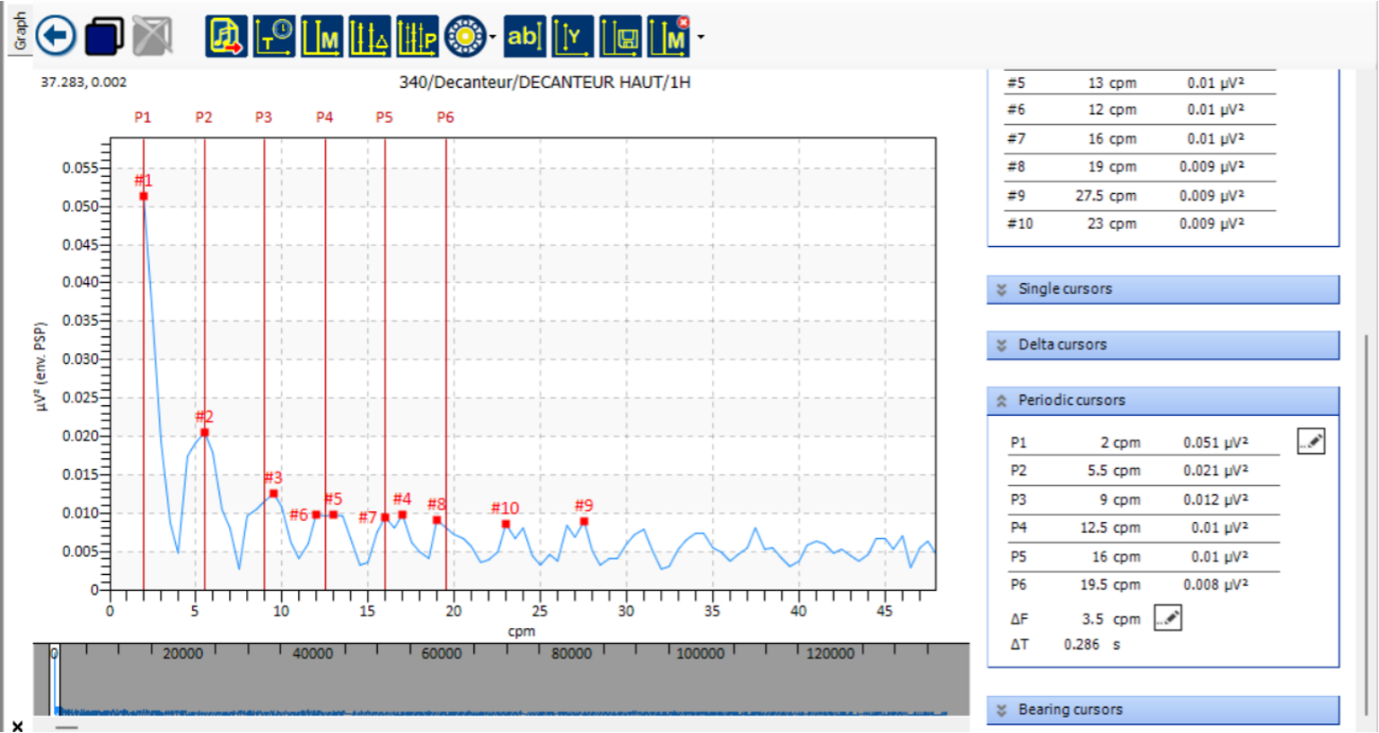
As observed in the pinion’s FFT, it can be seen that high levels of ultrasound above the sound floor are appearing at 1 X RPM.
Take into account that the resolution shows us a Delta F of 3.5 RPM. This number is not accurate as recordings were taken with too low of a measurement resolution. The real speed of the pinion is 2.95 RPM as shown in calculations earlier.

Figure 3 - FFT on the Pinion
With the use of the SDT340 ultrasound data collector, the Partnered Ultrasound Team was able to record data a full rotation of an asset turning once every 10 minutes. With this data, they were able to detect a broken tooth on the pinion, despite the slow speed, and low aptitude of the impacts.
It would have been very difficult, if not impossible to draw these conclusions with any other condition monitoring technology due to the low speed & amplitude of this defect.


